Landscape in photography focuses on the spaces in the world. These spaces can range from vast to microscopic in scale. A landscape photo often emphasizes the presence of nature, but it can also include man-made features and disturbances. Photographers love landscape photography for many different reasons. Here are some examples:
Portrait orientation affects composition
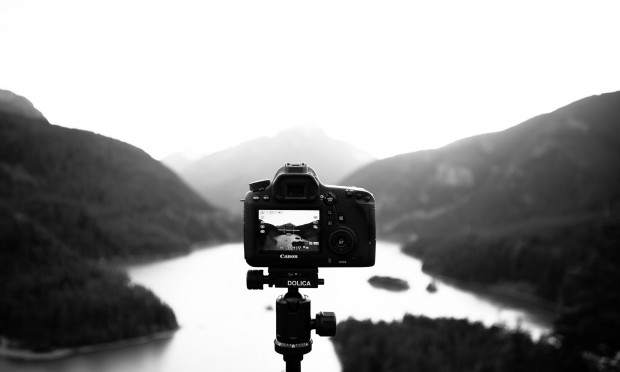
It is important to consider the message you wish to convey before choosing an orientation for your landscape photo. Portrait orientation emphasizes what is at the top and the bottom of an object. While landscape orientation emphasizes what is horizontal about a subject. It is possible to make the most of horizontal features by moving the camera around and considering different angles.
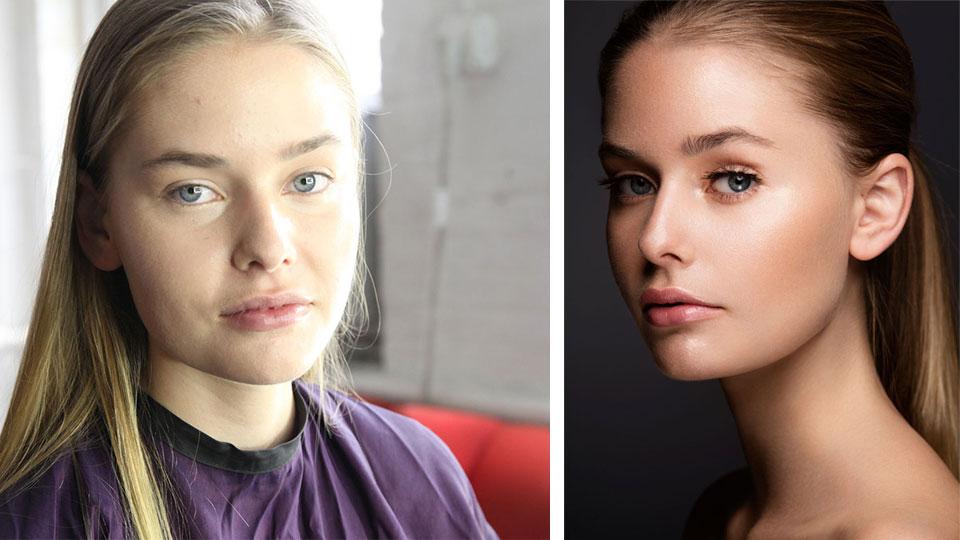
Another difference between landscape and portrait compositions is the subject's size. Portraits are more prominent and make the subject standout, while landscape photos can leave lots of space for the background. Portrait images require that the subject be within close proximity to the camera. It should also include only the subject, while leaving room on either side of the subject.
Wide angle lenses
While wide angle lenses are great for landscape photography, there are several things that you should consider before purchasing one. First, make sure you know how the lens will affect the landscape in question. A large lens can make the surrounding area appear smaller and less interesting. Remember that barrel distortion occurs when straight lines appear bulging out of the image. This is common with wider lenses. But, you can minimize it by framing and zooming in. To straighten out the lines, you can use post-processing software.
Ultra-wide angle lenses are available for those with more experience. These lenses can be more expensive than the standard wide-angle lenses, but they have an edge-to–edge sharpness that's difficult to find on other lenses. The majority of modern lenses are fully weather sealed, which makes them ideal for landscape shooters who must be outdoors in the elements.
Neutral density filters
An essential piece of equipment for landscape photographers is the neutral density filters. These filters are dark and can be mounted on the front part of the camera's lens. Because you can stack multiple filters without worrying about vignetting, neutral density filters are a popular choice in landscape photography. You can use this type of filter with almost any lens, which saves you both space and money.
Neutral density filters extend shutter length. This allows you to take longer exposures and not worry about the image quality being compromised. These filters can affect the image's sharpness, colour reproduction and colour accuracy. In certain cases, they can also create a "colourcast", meaning that the image appears warmer than it really is. Some filters can cause unwanted side effects so be cautious about which brand you choose.
Light source
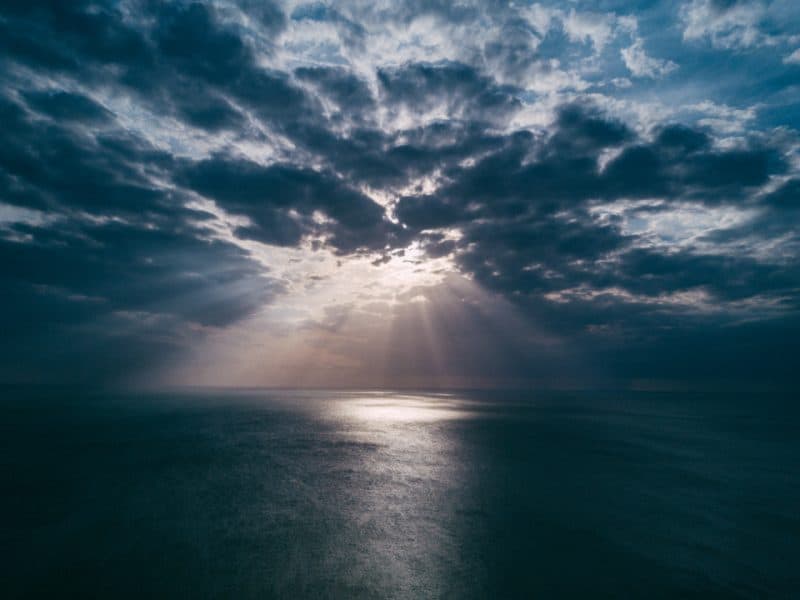
A light source for landscape photography could be any type of light source, including the sun, windows or tungsten bulbs. These sources can be used for softening your images or creating a glaring, intense light. The intensity and size of light sources vary, so it is important to be able to identify the differences between them in order for you to choose the right one for you. Lens guards and shades are often used by photographers to reduce lens flare.
The mood of your photograph can also be affected by how strong the light source is. The right lighting can make a landscape look more beautiful. Landscape photography is much more than capturing what you can see. It's about communicating an idea that you wish to share with others.
Subject size
It is crucial to consider the subject size when shooting landscape photography images. It will stand out more if placed closer to the subject than the rest of the image. However, you can also place it further back in the picture to emphasize the vastness of the land. It's up to you to decide what works best for your subject.
Consider the background, composition, lighting and lighting when choosing the subject for your landscape photography images. It is important to decide whether you prefer a portrait-style or landscape photo. You should also consider the purpose of the subject and what mood you are trying to achieve.
FAQ
Which Lenses Are Best?
The most frequently asked question by beginners is "What lens should i buy?" There are many options. It can be difficult to make a decision.
The good news is you don't always need to buy a different lens with every purchase of a camera. You can instead add lenses later.
Here are three types of lenses to start with.
-
Wide Angle Lens (14mm-24mm): These lenses offer a wide field of view that allows you to capture more detail. You can zoom in to improve image quality.
-
Normal/Standard zoom lens (28mm -70mm). These lenses allow the user to adjust focal lengths while still maintaining good image quality.
-
Telephoto Zoom Lens (70mm - 200mm): These lenses are great for capturing distant subjects. These lenses let you focus on the subject even if they are small.
You can also combine these lenses to create different effects. One example is to use a regular lens to photograph close-up details and then switch to a long-range lens to capture faraway objects.
Cameras for Sale
There are lots of places online where you can buy cameras. However, we recommend buying from a reputable retailer like B&H Photo Video. They have knowledgeable staff to answer your questions.
B&H ships quickly and securely to make it easy for you to get your order to your door.
You can learn more by watching this video about shopping for cameras.
Do I want to start taking photos as a hobby?
Photography is a great way of capturing memories and sharing them with loved ones. Photography allows you to see the world from a different perspective.
If you are interested learning how to take better photos, there are plenty online resources that can help.
You might also consider enrolling in classes at nearby community colleges or art schools. You can meet other photographers and get valuable feedback about your work.
What can I do to improve my photography skills with my phone?
Great photos don't require expensive equipment! Amazing photos can be taken with your smartphone.
Just need to learn the basics of how to use it all.
There are many apps to help you edit and share your photos on both Android and iOS.
These five tips will help you take better photos.
-
Set Up Your Camera App. The camera app should be pre-installed on the device. If not, download it from Google Play or Apple's App Store.
-
Use effects and filters. Effects and filters allow you to alter the appearance of your photos without needing to touch them.
-
Adjust the Exposure. You can adjust exposure to alter the brightness of your image.
-
Photograph in the Right Light It is easier to see details when you shoot in bright light. Low light photography allows you to capture shadows and highlights.
-
Take Pictures Of People. Photographing people can show others what you are most passionate about.
Learn more about taking better photos with your smartphone by reading our article 5 Tips to Improve Your Photography Skills.
Do I Need A Tripod?
This is a question everyone asks. The truth is that a tripod isn't always necessary, but it can come in handy.
It allows you to hold your camera steady when taking pictures at slow shutter speeds. A tripod can make all the difference when you're photographing landscapes or other stationary subjects.
On the other hand, if you're photographing moving subjects such as sports or people, using a tripod can cause blurriness. How can you tell which situations call for a tripod and why?
A tripod is useful when you need to photograph stationary or fast moving subjects. Examples include:
-
Sports
-
People
-
Landscapes
-
Close-ups
-
Macro shots
If you're unsure whether you need a tripod, try this test. You can hold your camera still while you look through the lens. A tripod is necessary if you notice blurred lines or movement.
If you don’t see blurring, adding a tripod is unlikely to make any difference.
If you do decide on a tripod purchase, these are some things to remember.
-
You should ensure that your tripod has smooth legs. This prevents unwanted vibrations from shaking your camera.
-
Choose a sturdy tripod. Some tripods are made of plastic, so they may not be as durable. Opt for a sturdy metal tripod.
-
You may want to consider buying a remote-control device. You can control your camera remotely with this remote release. You can set it to fire the shutter once you press the button automatically.
-
Make sure to look for a tripod that rotates 360 degrees. This makes it much easier to position your cameras horizontally or vertically.
-
Tripods are expensive. Expect to pay $100-200. But, you will get a lot for your buck.
-
Don't forget accessories such as memory cards or filters.
-
Before you buy online, make sure to check your local shops. Many retailers offer free shipping.
-
Check out customer reviews to learn what they think about a product.
-
Ask family and friends who have similar products.
-
You can learn from customers' experiences by visiting message boards and forums.
-
User reviews can be found online.
-
Amazon.com allows you to compare prices, and receive customer feedback.
-
Take a look at these photo galleries to see what other photographers do with tripods.
What makes a good camera bag?
It is essential to choose a camera bag that protects your gear when you travel. Here are some factors to keep in mind when choosing a bag.
-
The bag should be large enough to comfortably hold your accessories and cameras. Don't go bigger than you think you will need.
-
Durability: Choose bags made from durable materials like leather, canvas or nylon. Avoid plastic or fabric bags.
-
Protection: Make your bag waterproof against dirt, moisture and scratches
-
Organization: You can organize your gear by category to make it easier for you to find the right thing. You can put your lenses in one place, your memory cards and your battery charger another.
-
Comfort: A shoulder strap is a better choice than a handbag for shooting. A comfortable design should have padded straps.
-
Price: You can shop around to find a great price. Discounts are sometimes offered by some brands, which can be a bonus.
-
Warranty: Ask if the company offers a warranty on its products. This will allow you to know who to contact if your bag becomes damaged.
What is the rule to thirds in photography
The rule-of-thirds is a simple way to create interesting compositions using no complicated camera settings. This divides your image horizontally and vertically into nine equal parts. It creates three main areas, where your subject should appear. These are the top third (the upper left corner), middle third (center), and bottom third (lower right). These areas can serve as guides to help you position your subject within your frame.
You can avoid placing important elements too close together, or too far apart, by using the rule of thirds. If they are too close to each other, it may be difficult for them to make a strong visual impression. They might lose focus if they are too close together.
Statistics
- There are people out there who will pick at flaws they can only see in 100% crops of your photos. (wikihow.com)
- That's the easiest way to get blurry photos 100% of the time. (photographylife.com)
- While I cannot prove that all of those spots were not sensor dust, the photo was taken during a heavy snowstorm…so I guess that 99.8% of the spots are snowflakes. (bhphotovideo.com)
- In this case, 100% of readers who voted found the article helpful, earning it our reader-approved status. (wikihow.com)
External Links
How To
How to take pictures in low lighting conditions
Low-light photography refers to taking photos in dimly lit or dark environments. It requires special equipment. The key challenges are in controlling exposure, white balanced, and sharpness. There are two kinds of low light photography. Flash photography works best when there is enough lighting around. But if there isn't enough natural light, then you'll have to use a flash. Without a flash, it is possible to get a poor picture if the subject is indoors and not outdoors. You can also shoot at night when the moon is shining. This will allow you to get nice shadows and colors. Another option to consider is shooting during twilight. Twilight occurs when the sun has set, but there is still daylight left.
You might also be interested in long exposures. Long exposures can be used to capture images even if the shutter has been closed for several minutes. The camera records only light that falls on it if the shutter is not closed. This light continues to fall onto a photo sensor throughout a prolonged exposure. The shutter was not opened, so no new light entered the lens. This means that you will not see any movement. To ensure clear images, disable any autofocus and exposure settings. Adjust the ISO setting before you start to shoot. A 200 ISO setting gives you greater control over how dark or bright your image looks. The shutter button should be pressed quickly when you are ready to take the photo. This will bring the shutter completely to a close. Then, you should hold the shutter button until the last possible second. The shutter button should be held down to prevent more light from entering the camera. After you've taken the picture, wait a few seconds before releasing the shutter button. This will allow the camera to process your image. While you wait, your photos will be displayed on your computer's screen. Once you're satisfied with them, save them to your computer.