
All successful photographers possess four key skills. These skills include technical expertise in light, post production editing, and communication skills. This article will provide detailed information on each skill. You can start learning them today! And be sure to keep reading for more information! You may be surprised at just how much you can learn! Make it a success as a photographer Here are some tips for starting your photography career:
Lessons from LIFE Magazine's wedding photographer
Wedding photography is an art and a business. You have to learn both the art and the business. That way, you can create the images you want. This course teaches you exactly what it is. This ebook will help you to make the most of your photos. This course contains five videos and a 600-page ebook. The program will help you create the wedding photos of your dreams.
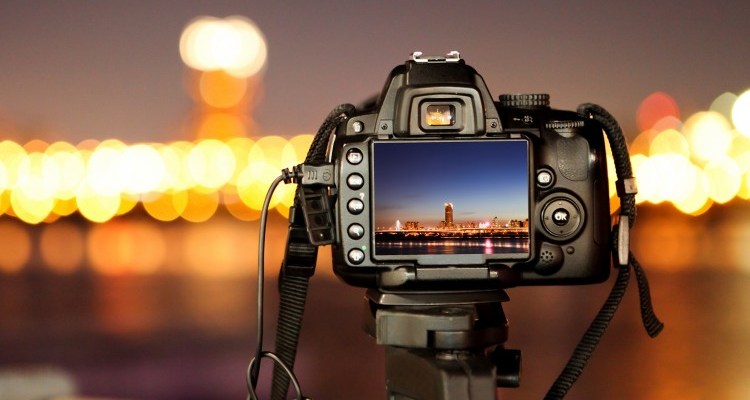
Begin by scouting the location. The best light conditions for your shots will be determined by the location you've scouted. If you're working at a large venue, it's important to know where the best spots are for positioning shots. A photographer must also be able to adapt to the changes in lighting. You will be moving around quite a bit so make sure your feet are comfortable.
10 rules of photography
It is important to be aware of the following basic issues when photographing. These issues can then be divided into nine equal segments. It is important to place the most important elements along one or more lines. It is possible to place important elements near the intersections or edges of two or more lines. If you are trying to capture a landscape in a photograph, for example, place the horizon along one line. The same applies to landscape photography. Place the subject vertically while the background is along the opposite line.
Although there are many photography rules, they are not necessarily set in stone. They are meant to be guidelines, not rules, and sometimes, you'll find that the rules will apply to your scene just fine. You should remember that they can be broken if necessary. These rules will help you to take better photos and allow you to express yourself creatively. Listed below are some of the basics of photography composition:
Communicating directly with your subject
It takes more than technical knowledge and technology to take great photos. Photographers need to be able communicate well. The images they create will not convey the right emotions. Communication is key to making the photos more authentic and generating more interest in the subject. These are some tips to help you communicate with your subject so that you capture the perfect shot. Communicate with them, and be professional. Your professionalism and abilities will be reflected in your photographs.
Communication is essential in photography. To create the best photographs possible, it is important to establish a rapport with your subject. Photographing can be stressful and nerve-wracking. It is crucial to communicate effectively in all aspects of your job. It is important to be able negotiate with your subject, when to compromise and to have patience. Photographers who are successful have the ability to tell compelling stories while communicating a clear message to their audiences.
Post-production editing
To make photos look great after they have been taken, edit them. Post-production editing involves the addition of effects like brightness, contrast, and saturation to images. Depending on what type of project you are working with, post-production editing could take hours to days. Here are some suggestions for how to edit photos to increase their quality.
The most important techniques for post-production are color grading, image stabilization, and other related tools. These techniques can be used to produce stunning digital images. These are also much cheaper than long photo sessions. Noise reduction is another technique that post production editors can use to enhance photographs. A noise reduction technique can reduce blurred photos and make them look clearer. A specialist can reduce noise values to make an image appear more natural.
FAQ
Do I Need A Tripod?
This is a question everyone asks. A tripod isn’t always needed, but it can be very useful.
It allows you to hold your camera steady when taking pictures at slow shutter speeds. If you're shooting landscapes or other stationary subjects, then a tripod can make a big difference.
A tripod can also cause blurriness when you are photographing people or sports. How do you determine which situations need a tripod?
A tripod is useful in situations where you want to take pictures of fast action and stationary subjects. Examples include:
-
Sports
-
People
-
Landscapes
-
Close-ups
-
Macro shots
You can use this test to determine whether you need a tripod. Take your camera and hold it still. Then, look through the scope. If you see blurred lines or movement, then you definitely need a tripod.
If you don’t see blurring, adding a tripod is unlikely to make any difference.
These are just a few tips to help you decide whether or not to purchase a tripod.
-
Your tripod should have smooth legs. This helps to prevent vibrations from shaking the camera.
-
You should choose a sturdy tripod. Some tripods are made of plastic, so they may not be as durable. Look for a metal tripod instead.
-
A remote release is a great option. This lets you control your camera remotely. This allows you to set the shutter to automatically fire when you press it.
-
Look for a tripod that has a 360-degree rotating head. This makes it easier to position your camera vertically or horizontally.
-
You should keep in mind that tripods don't come cheap. Expect to pay $100-200. You will still get a lot out of your money.
-
Don't forget accessories such as memory cards or filters.
-
Before ordering online, you should check in your local shops. Many retailers offer free shipping.
-
Review a product to find out what other customers think.
-
Ask friends and family members who own similar products.
-
Forums and message boards are a great place to find out about customer experiences.
-
Search online for user reviews.
-
Use websites like Amazon.com to compare prices and read customer feedback.
-
Check out these photo galleries for an example of the work that photographers do with their tripods.
What equipment is necessary to begin digital photography
You should first consider what kind of camera you want when you begin digital photography. There are many options available, including DSLRs (digital single-lens reflex cameras), compact point-and-shoot cameras, camcorders and smartphones. Each model has its own unique features and advantages. DSLR cameras, for example, offer superior quality images but are heavier and larger than other types. Point-and-shoot cameras tend to be smaller and lighter, and may have automatic settings for specific situations. Camcorders are capable of recording excellent video quality and can also be used to take still photos. Smartphones are light and portable and can be carried around easily.
Once you've decided on the type of camera you'd like to buy, you will need to decide whether you would rather buy a used or new one. You can find affordable used cameras, particularly if you bought them in the last few years. Newer models usually cost more as manufacturers invest large amounts of money to develop new technology.
Next, purchase lenses. Lenses play a key role in determining the quality of your photographs. They let you adjust the focal length to zoom in and out of the scene, without losing focus. Some lenses are equipped with flash units built in, while others require external flash units. A wide range of lenses is available from various brands, each offering unique characteristics.
Finally, memory cards are something you should consider. Memory cards can store pictures that were taken with your digital camera. The size of your memory card will depend on the number of images it holds. It could store hundreds of thousands or even millions of pictures. You will need multiple memory card if you plan on taking many photos.
How do I learn to take photos on my own?
There are many different ways to learn how take great photos. There are several options. You can read a book, go to a class, or join an internet community. You can't go wrong with doing it yourself if you are serious about mastering the art of photographing. So you can decide what goes into each picture. You will continue to learn and improve, so long as you are willing to keep learning.
Digital photography doesn't require expensive equipment. You only need a computer and an internet connection to take pictures. The rest is up to you.
Here are some tips to get you started.
-
Familiarize yourself with the manual settings for your camera.
-
Learn the basics of controlling your computer.
-
Make sure to take lots of pictures.
-
You can edit them.
-
These are yours to share.
-
Keep practicing.
-
Experiment.
-
You can try different perspectives and angles.
-
Use light sources creatively.
-
Practice makes perfect.
-
Do not be afraid to fail.
-
Be patient.
-
Have fun!
Which Lenses Should I Use?
The most popular question that beginners ask is "What lens do I need?" This is a difficult decision because there are so many options.
The good news is that you don't necessarily need to buy a new lens every time you purchase a new camera. Instead, you can add lenses later on.
For starters, here are three types of lenses you might want to consider.
-
Wide Angle Lens (14mm - 24mm): These lenses give you a wide angle of view, allowing you to capture more of your subject. You can zoom in and not lose image quality.
-
Normal/Standard Zoom Lens (28mm to 70mm) : These lenses allow you the flexibility of changing focal lengths, while still maintaining high quality images.
-
Telephoto Zoom Lens (70mm - 200mm): These lenses are great for capturing distant subjects. These lenses let you focus on the subject even if they are small.
Combining lenses can create different effects. To capture close-up details, you can switch between a normal and telephoto lens.
Statistics
- There are people out there who will pick at flaws they can only see in 100% crops of your photos. (wikihow.com)
- The second easiest way to get blurry photos 100% of the time is to use a cheap filter on the front of your lens. (photographylife.com)
- That's the easiest way to get blurry photos 100% of the time. (photographylife.com)
- By March 2014, about 3 million were purchased monthly, about 30 percent of the peak sales total. (en.wikipedia.org)
External Links
How To
Lightroom: How to Use It in Photography
Adobe Lightroom, a powerful tool that allows photographers to edit photos quickly. It allows you to import your images into one place where they can be viewed, edited, cropped, lightened, and saved. You can share them online or print them.
In addition to editing tools like cropping, adjusting brightness, contrast, and color balance, Lightroom includes a library of presets that make it easy to apply common effects such as vignette, lens distortion correction, and black & white conversion. The best part about Lightroom is that you can apply these effects automatically when exporting your image.
Adobe Bridge allows you to access Lightroom. This lets you view thumbnails and organize your files while browsing through your collection. You can also add keywords to images to make them easier to find later.
Lightroom is free if this is your first time using it. This gives you all the basic features. If you decide you want to upgrade, there are two options: buy the full version outright or get a subscription.
Lightroom can be downloaded in many ways. Adobe offers the option of purchasing the software directly. Another way is to download the trial version and convert it to a paid license. Here are the steps.
-
Lightroom Trial Version
-
Start the program. At the bottom, click "Convert license"
-
Enter your payment information and select the type license you wish (permanent, one year)
-
To finish the process click "Continue".
-
Once the trial version has been converted to a paid licence, you can continue using the license until the end.